Even if you're not following the news about recycling and plastic pollution as closely as I am, you've probably seen some of the articles (try
this one or
this one or
this set of photographs to start) or noticed that your garbage company or city has changed the rules about recycling of late.
The shake up in recycling is caused by the fact that China - who used to buy the vast majority of our recycling to process and turn into plastic pellets for sale -
stopped accepting it in January of 2018 because it was too contaminated and was destroying what's left of their rather battered environment.
Which
leaves us with a whole lot of "recycling" on our hands. A few other countries in South East Asia have been accepting smaller amounts of it but they're getting quickly overwhelmed by both the sheer volume and the messy state it's in. Facing massive price increases from waste management companies,
some U.S. cities and towns have recently stopped recycling altogether. Others are now burning it all in energy-producing facilities. While producing energy from a waste product is theoretically a good idea, it's undermined by the deeply negative effect this petrochemical infused smoke is having on air quality and public health. Nish-nish!
It's a complicated mess -- our reliance on plastic, our mania for convenience and corporations' quests for ever-greater profits are turning our planet (especially our oceans) into a gigantic garbage dump that's killing marine life like sea turtles who routinely and understandably mistake plastic bags for jellyfish - one of their favorite foods.
There is no natural process that can break down conventional plastics. As a result, nearly every piece of plastic ever produced is still with us either in a landfill, in our oceans or just lying along the roadsides.
Plastic doesn't ever go away, it just breaks down into smaller and smaller pieces that eventually infiltrate
our groundwater, soil, food and air, filling our bodies with bad chemicals that increase our risk of cancer and other ills. That's the bad news.
The good news is that there are two levels of solutions you can pursue:
personal solutions and policy solutions. Although this post will focus on the personal, I want to be clear that while personal solutions are important,
policy solutions are actually far more important and effective. We can't just switch to glass storage containers and metal straws and call it a day,
we have to push for systemic changes on a much larger scale. I plan to write a series of other posts on the policy solutions with clear, simple instructions on how you can help tackle things like banning plastic bags, straws and polystyrene foam in your community and putting pressure on manufacturers to change the way they package their products.
But since I know you probably spend a decent amount of time in your kitchen,
we'll start today with some simple changes you can make in your own life right now. Some of these may be tougher for you than others. Most will take some repetition to cement them into habit but you'll feel much better about your impact on the world. If this list overwhelms you, just pick one or two to start, bookmark this post and come back to it when you're ready to take on another one or two.
KICK THE PLASTIC HABIT
1.
Stop using plastic wrap -
it's bad news. Try one of the wax-infused fabrics like
Abeego,
Bee's Wrap or other
brands or
make your own which is significantly cheaper and could be a good project to do with any kids in your life as most kids love wax! You can also get a
set of silicone stretch lids to cover bowls and pots. Even easier, you can do what I do and simply cover the bowl with a clean plastic produce bag or a plate that's the right size - both work well and are don't cost a cent.
2.
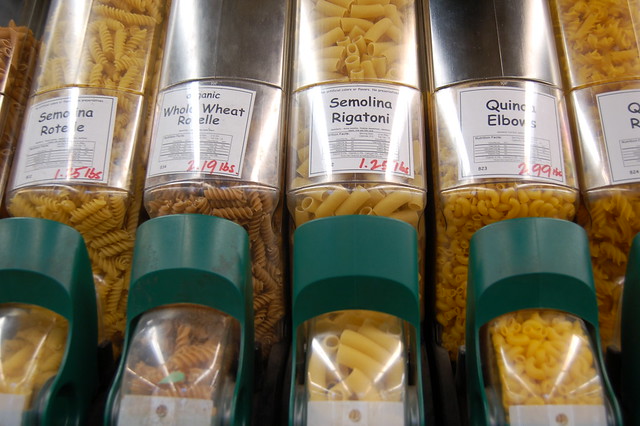
Stop buying foods and other things packaged in plastic. Just say "no" to foam trays, blisterpacks, clamshells, shrink wrap, plastic wrap, and the like. If you can't buy it in bulk (see below) or get it at your farmers market or in
your CSA box, opt for a version sold in glass, cardboard or metal. And while you're resisting, it would be very helpful if you politely told the store manager that you are not going to buy things packaged in plastic and urged her or him to consider choosing other products.
3.
Buy in bulk, bringing your own reusable containers to fill. Search for stores that sell food, soap, shampoo, moisturizer, etc., in bulk near you and/or see if you can join a mail-order coop locally. Here's
my advice on this topic (old but still good.)
4.
Bring your own bags and stop taking plastic bags for your fruits and veggies, too. If you're like me, you've got a ton of reusable canvas totes at your disposal. Squirrel them away in any spot you might ever need one - your car, your bike, your little grocery cart. Place them by your front door to make it easier to remember them when you head out to fill the larder. If you're in the store and realize you forgot them, either run back out and grab them or just load everything into your cart and then pack it into your bags at your car. If you absolutely have to take a bag from a store, make it a paper one. This is a habit that takes a bit of repetition to establish but, thankfully, plastic bag bans are on the rise (
including right here in my neck of the woods!) so, hopefully, stores near you will stop offering plastic bags soon which will force you to remember your reusable bags. It's a good example of the power of intelligent public policy. 😁
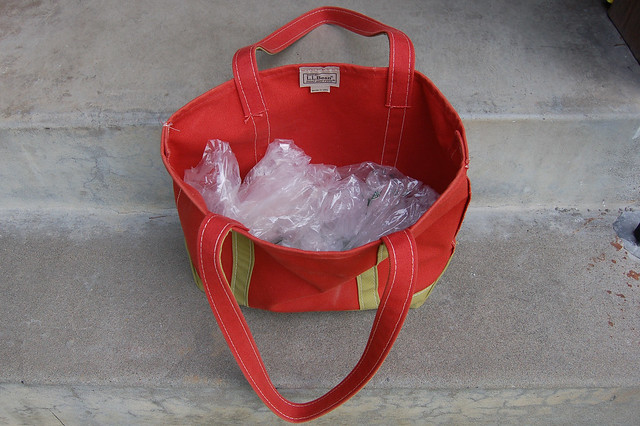 |
| One of my many tote bags filled with cleaned, dried, reused plastic bags for produce. |
5.
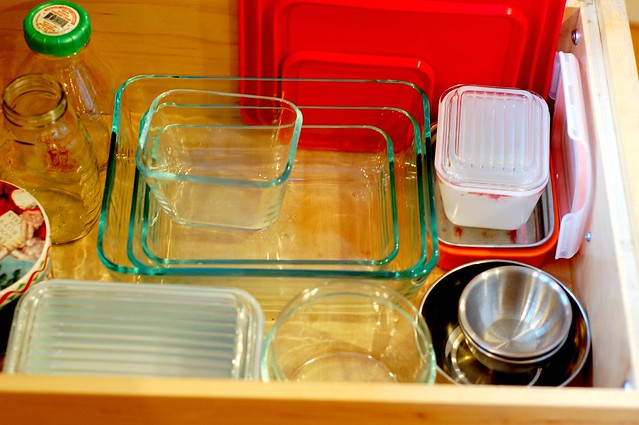
Replace plastic tupperware with glass and metal storage containers.
My previous advice on this quest is here and it's still all true. If you want recommendations, this 8-piece set with snap lids by OXO is nice as is this
9-piece set by Utopia. I like that both are made from borosilicate glass which means can withstand dramatic temperature changes without breaking (
unlike frikking Pyrex whose parent company Corelle quietly switched to using cheaper, less durable glass in its U.S. products about 20 years ago...) I'm also partial
Luminarc's glass working jars with lids which I like to use for things like salad dressing and yogurt. I do own a whole lot of glass
Pyrex storage containers, too. And we rely on a selection of metal
Lunchbots bento box-style containers and
Konserve round containers that see heavy use in our kids' lunches.
6.
Don't succumb to plastic cutlery - bring your own set of reusable cutlery with you. When I was in college (twenty years ago - how did that happen?!0, I bought a bunch of sets of
metal knife, fork and spoon on a ring and gave them to all my friends and family in little canvas carrying sacks I'd made. I still have mine and they're in perfect shape although the canvas carrying bag is rather dirty - I keep them in my backpack so they're there when I need them. Others have had the same idea since and now there are similar sets made
out of bamboo. I am also intrigued by this
folding metal spork and this
5-in-1 combination deal (though it has a plastic handle.) You really do not have to buy anything to embrace this concept - just take your smallest fork, knife and spoon and put them in a small carrying case.
7.
Skip the plastic straw - you can bring your own stainless steel or bamboo straw or just (gasp!) drink straight from your reusable cup or mug. I bought a
four-pack of these metal straws years ago - they're indestructible. You can also get glass straws but it seems like asking for trouble to me, particularly if you're going to carry it around with you.
8.
Use actual cutlery, plates, cups and napkins next time you host a party or event and plan to just wash it all after the fun is over. Don't forget to put out separate bins for food scraps to compost and for any recyclable cans and bottles. It might take a few dishwasher runs to get through it all but don't you want your kids to inherit a habitable planet?! If it's a really big event, you can rent dishes, glassware, silverware and napkins.
10.
Bring your own mug or cup when you get coffee, tea, a smoothie or other drinks out. There are some great options out there nowadays including this
double walled glass travel mug, this
insulated steel mug and this
insulated stainless steel tumbler. If you have time to sit down, just ask them to serve it in a china mug or a glass.
11.
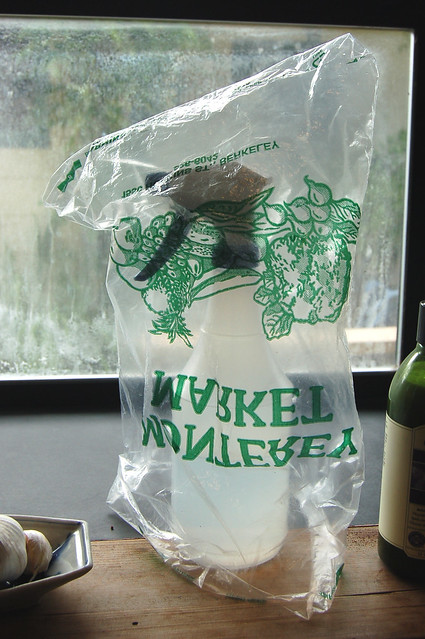
Do NOT buy water or other drinks in plastic bottles. In addition to littering the planet, they're bad for your own health (that leaching problem again). Bring a stainless steel or glass water bottle with you and use it, instead. I am a loyal
Kleen Kanteen user and also really like these
Hydroflask insulated water bottles. Glass is a good if somewhat heavier and more fragile option (better for adults, methinks) and
Lifefactory has some nice ones.
12.
Bring your own take-out containers to restaurants and stores so you don't have to take a foam, plastic, plastic-coated cardboard or aluminum takeout container home with you in your efforts to avoid wasting food. One thing I do is to leave a
clean, multi-tiered, metal tiffin in the trunk of my car so I can run out and grab it if I need it. Plus, this gives you an opportunity to say the word "tiffin" which is just such a pleasure :)
13.
Wash and reuse Ziploc and other plastic bags as well as sturdy plastic containers from yogurt, sour cream, cream cheese, etc. Use them until they finally give out. When they do give up the ghost, replace them with
a set of washable cotton produce bags like these. Meanwhile, you've been buying in bulk,
making your own yogurt and choosing milk and other products sold in glass bottles so you should not be collecting nearly as many of these containers anymore, right?
14.
If you pack lunch, switch to metal containers and reusable sandwich and snack bags. There's been a lot of innovation in the last decade so there are great options out there including my personal favorites,
Lunchbots stainless steel divided bento box style containers. If you're looking for something to replace Ziplocs and sandwich bags, try
Lunchskins and
Stasher -- even though the Stasher bags are made of silicone - which
is plastic - they are sturdy enough to last for years, taking them firmly out of the single use category. Of course you can always reuse plastic containers you have on hand - something we do every day along with our Lunchbots and reusable sandwich bags. You've already got my recommendations on the best water bottles.
15.
Stop using wipes. I know this is a tough one for parents of babies and toddlers (it's definitely hard for me!) but I read
this article in the Atlantic recently and now I can't unsee it -- the term "fatberg" seems permanently etched in my memory 😱. Wipes are made from plastics and synthetic cellulosic fibers that will never fully degrade but instead break into microplastics which transmit harmful chemicals to marine wildlife (and ultimately, to us). So it's back to toilet paper, washcloths, rags and good old-fashioned soap and water to clean our dirty butts and kitchen counters. If you don't already have a set, try these fabulous
Swedish cloths in lieu of wipes or paper towels. Environmentally-friendly (made from cotton and wood pulp-derived cellulose), washable, durable and cute to boot.
If you made it all the way to the end of this post, I am
very impressed as I know it's been a long one. Feel free to leave me a comment here to let me know where you are in the journey to cut plastic out of your life. I am curious about what's been hardest and easiest for you to change and eager to hear any tips and tricks you want to share.
You might also like: