

When my husband's grandmother, Marcia, a great cook and remarkable woman who I loved, passed away a few years ago, I inherited her preserving cookbook, Putting Food By.

Her notes include where she picked the fruits or vegetables (the names of farms and orchards which must have been near her home in Grafton, VT sprinkle the pages -- Dutton's, Warren's, Harlow's, Allen Brothers, and Lake Warren), comments on the crop ("good yield" or "small onions"), how much of each thing she made, as well as a few recipes, including one for homemade breakfast sausage.
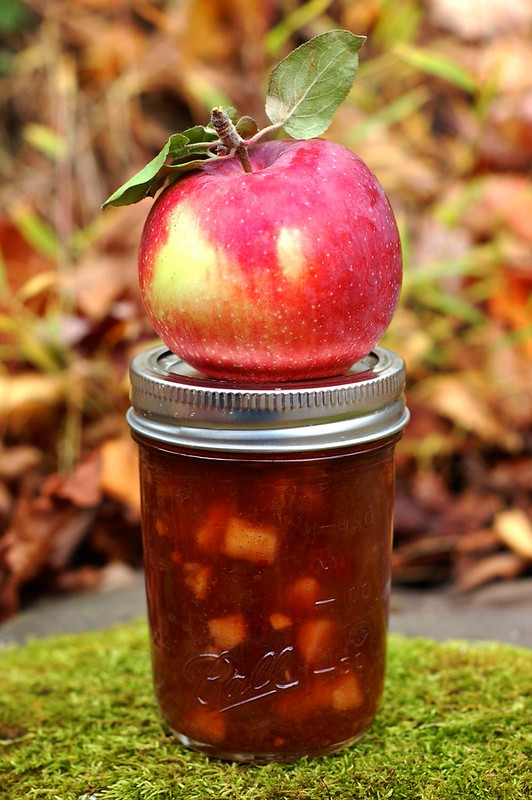
Grandma Marcia was a prolific canner -- rhubarb, peas, applesauce, apple butter, tomatoes, onions, strawberry jam, blueberry jam, etc. She actually had to tape in a few extra pages to keep track of all her canning harvests.

Inspired by Marcia's passion and armed with her annotated copy of Putting Food By
By and large, my efforts have been successful. Canning does require spending a lot of time over a very hot stove, but there is something incredibly rewarding about opening a jar of bright red tomato sauce or a pint of sweet golden peach halves in the dead of winter. The tastes of summer brighten the short, dark days of winter.
In order to avoid poisoning your family and friends, you will need to follow a recipe closely. If this is something you are interested in, I'd strongly suggest buying or borrowing a canning and preserving cookbook (see below for some suggestions.) However, there are some basic steps that will be the same regardless of what you're making. Hopefully, this little overview will help to make canning clearer and less intimidating.

Equipment
- Canner (basically a big pot - I use the boiling water method, though there is also something called "pressure canning" that uses a pressure cooker - a must if you plan to can low-acid foods or meats)
- Canning rack (a rack that holds the jars in the canner)
- Funnel (for pouring hot liquids into the jars)
- Jar lifter (tool you use to grab the hot jars and lift them out of and into the boiling water in the canner)
- Jar wrench (tool you use to tighten the lids)
- Jars, tops, and lids (size will depend on what you're canning and how you want to preserve it)
- Clean dishtowel or two

You can buy the canning pot, funnel, jar lifter, rack and jar wrench for under $50. Most hardware stores sell them or you can easily buy one online like this Ball canning set on Amazon.

Method
Although the cooking times and packing instructions will vary depending on what you are making, there are some basic guidelines you'll need to follow, no matter what you're preserving.
1. Sterilization. You must sterilize your jars and lids by boiling them (though some recipes also suggest sterilizing them in a dishwasher) for 15 minutes before filling them. As long as the glass jars are not cracked, scratched, or compromised in any way, it's fine to re-use them, however, the tops and lids cannot be used more than once - you must use new ones each time you can.
2. Get Your Food HOT. It's important to pack the jars hot. The jars should be hot from the boiling you just did to sterilize them and in most recipes, the food, itself (applesauce, tomato sauce, jam, etc.) should be bubbling hot on the stove when you pour it into the sterilized jars. Or, if you're making something like dill pickles which you pack into the jars cold, the pickling liquid you're using to fill the jars, should be boiling hot.
3. Acidity Levels. One of the keys to successful canning (meaning that whatever you make will NOT kill anyone!) is to follow the recipe/directions closely. In addition to all the boiling, the thing that will preserve the food you're making is the amount of acid in the recipe. Some foods are naturally acidic and others are not. High-acid foods are easier to work with, while low-acid foods require longer cooking times (and possibly the use of a pressure canner which will cook them at a higher temperature than the hot water bath canner I use.) So it is important to follow the recipe and use the exact amount of the exact ingredients and cook at the exact temperature for the exact length of time.
4. Boiling Times. Boiling the filled jars for the appropriate amount of time is also important to ensure that no bacteria survive. The jars should be sealed tightly and you must leave enough headroom (usually half an inch though this may vary by recipe) to ensure that the food has room to expand in the heat without denting the jar tops and lids (and therefore destroying the seal). You must have enough water in the canner to cover the tops of the jars by two inches.
5. Slow, Even Cooling. Once you've boiled for the specified amount of time, you should remove the jars, and place them on a clean towel with enough space between them to allow air to circulate. All the recipes I've read say that they must be in a draft-free place. I believe this may be due to fears that a cold breeze could cause the hot jars to crack (but I am not 100% sure). Regardless, it's easy enough, so just do it!
6. The Proof is in the "Pop". As the jars cool, the lids should be sucked down by the contracting air in the bottle, resulting in a delightful popping noise as the jar seals. If the tops do not pop down, the seal has failed for some reason. But, as disheartening as it can be when a lid fails to pop, all is not lost, just eat the contents of that jar right away and keep it in the fridge.
7. Storage. Once the jars have cooled completely (let them cool overnight) and the lids have popped down, store them in a cool, dry, dark place. This will help keep the colors of the canned good from fading and help prevent the contents from spoiling.
8. Don't Eat Anything Suspect. If any of the jar lids look misshapen or pushed up or if you notice mold, bubbles, cloudiness, bad smells, or oddly discolored food when you open the jars, do not eat them! Throw the contents (and the jar lids and tops) away.

Recipes
I've compiled all my tried and true recipes for canned and preserved homemade goodies and am always adding to the list! Check them out to see if anything appeals to you.

Cookbooks
- Ball Complete Book of Home Preserving
- you gotta figure that the makers of the glass jars know a thing or two about canning... This is more or less the Bible of home preservers everywhere and with good reason. I use my copy all the time though I will note that I almost always use WAY less sugar than they call for.

- Put 'Em Up
- a super fun selection of recipes - browsing through this will make you want to can everything you can get your hands on! She's also got a great fruit-specific cookbook out called Put 'Em Up - FRUIT.

- Food in Jars: Preserving in Small Batches Year-Round
- a new cookbook by one of my favorite bloggers, Marisa McClellan featuring an overwhelming number of delicious ways to can and preserve food.

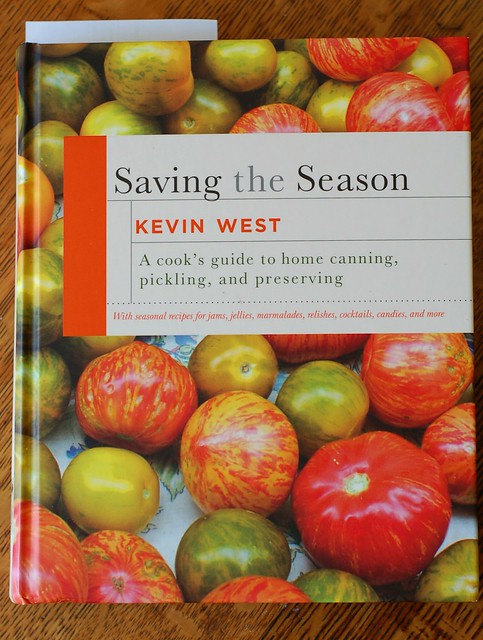
- Saving the Season: A Cook's Guide to Home Canning, Pickling, and Preserving
- a friend sent me this book and I keep finding more and more things to make in it. Very comprehensive and I love the photographs, stories and notes, too.
Sites & Blogs
There are sooooo many inspirational web sites and blogs in the realm of canning and preserving. Here are just a few of my favorites:
- Punk Domestics
- From Scratch Club
- Food In Jars
- The Preserved Life (Julia is truly inspirational - I like her so much I profiled her for Edible Hudson Valley)
- Hungry Tigress (she's got two categories/blogs - jam and pickles)
- Mrs. Wheelbarrow's Kitchen
- The Girls' Guide To Guns & Butter
- Well-Preserved
- Autumn Makes & Does
- Doris & Jilly Cook
- Grow & Resist
- Canning Homemade

Please note: some of the links in this post are Amazon affiliate links which means I will earn a few cents if you purchase the item I've linked to. These are all products I use myself and fully recommend - I do NOT shill for products and companies I do not 100% believe in.
15 comments:
What a gift to inherit her cookbook. That's so cool. We put food "up" and she puts it "by". :)
What?! Throw away the jar lids EACH time?! Why? I've never had a problem re-using lids, and I don't live in a place where it is easy to get replacement lids. What will happen if I re-use? Obviously I sterilize in boiling water before use...
I would NOT reuse your lids - the seals wouldn't be trustworthy. However, there is a kind you can resuse - they're made of plastic and made by a company called Tattler. I haven't used them but many do - you can find more here: http://www.reusablecanninglids.com/
Thanks for the info. I'm curious as to whether your husbands's grandmother went out and bought new lids each time she was canning back in the 70s & 80s.
Where do I buy those Ball jars? Any advice is appreciated. I tried to buy at stores like Michael's but they are always out..(
Thnaks!
L
Great article! Whre do I buy those glass jars? Every time I am at Michael's, they are out...
Thank you!
L
Graet article, thnak you! Do you have a suggestion where do I buy those glass jars? Every time I am at Michael's, they are sold out and I have never seen tiny ones...
Thanks,
L
Hi Westchester mom, try your local hardware store - ACE or True Value always seem to be pretty well stocked.
From my understanding, according to the canning books and sites I have read and from personal experience, the rings are reusable. They do not seal the lid on the jar and can be used year after year as long as they are not rusty or bent. The lids (the flat disc shaped part) are the actual seals and need to be replaced before any new project. The rings just help keep the lids in place during the processing time.
From my understanding, according to the canning books and sites I have read and from personal experience, the rings are reusable. They do not seal the lid on the jar and can be used year after year as long as they are not rusty or bent. The lids (the flat disc shaped part) are the actual seals and need to be replaced before any new project. The rings just help keep the lids in place during the processing time.
Yes, that is what I believe to be true, as well. The rings (also called bands) are reusable as long as they don't get damaged or bent out of shape. But the lids (unfortunately, the parts that also contain BPA...) are not reusable and need to be replaced each time. Or... you can invest in some wonderful Weck canning jars which are fully reusable (glass lids and a different system of keeping them in place) and completely BPA free, too. They're a bit pricier but as long as you make sure you get them back from anyone you gift canned goods to or swap with, they should last for years.
when canning in a boiling water canner, do I boil the water before adding the jars? When do I start timing?
Hi Jackie, yes, you should have the water boiling before you add the sterilized jars packed with food to it. And you start the timing once you've got all your packed jars in the boiling water bath. Hope that helps!
I use your recipe for Red Pepper Jam and it is perfect. I can with Weck jars but you kind of need to know what you are doing. Getting those rubber rings in place can be a little fiddly and USDA will not come out and endorse or unendorse them. If you are a beginning canner I would get a Ball preserving book and follow it to the letter with no messing around with changing ratios of ingredients or skipping steps. I would start with Mason type jars first. They are easier I think. I use them with my gifting canning. Weck jars are too expensive to give away-for me anyway.
Agreed! A number of years ago, I stopped at a yardsale and someone GAVE me a big cardboard box full of gorgeous weck jars and lids. I couldn't believe it!
Post a Comment